Install RSAT On Windows 10 Using Powershell
- Byron Zepeda
- Category: PowerShell
- Read Time: 2 mins
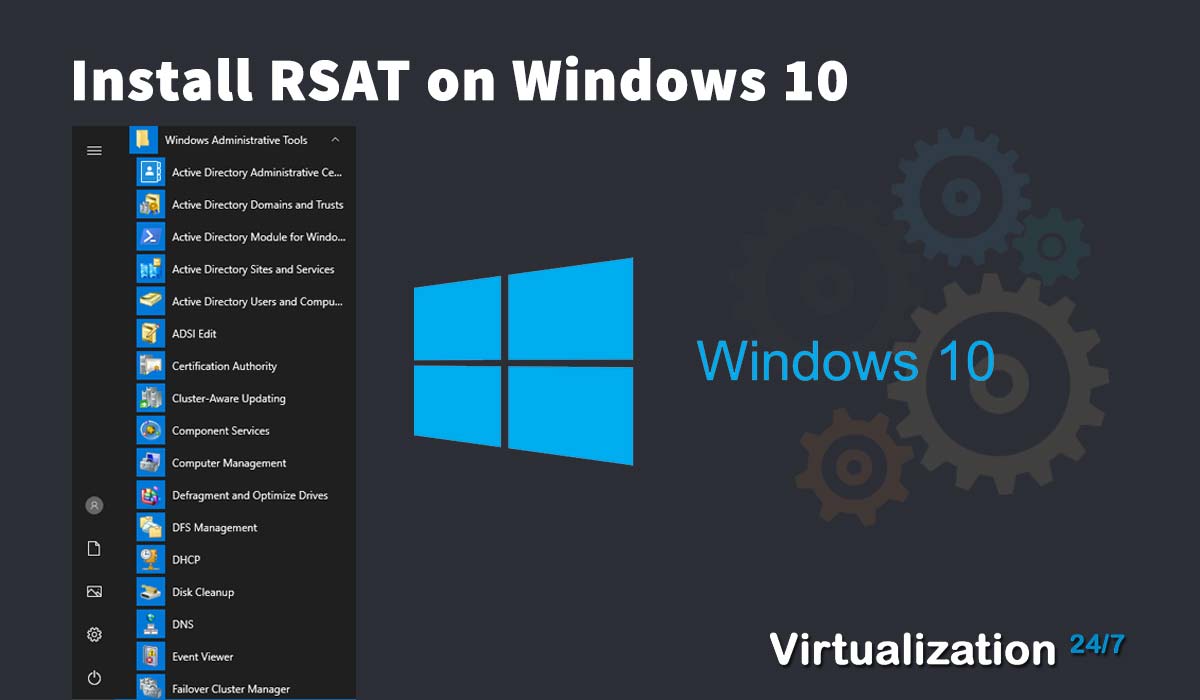
Microsoft has, for a long time, provided tools called Remote Server Administration Tools (RSAT) to do remote administration of servers and desktops. These tools are handy if you are regularly having to look at configurations or make changes for machines joined to a Microsoft Windows Domain. Unfortunately, installing these tools is not always that easy since Microsoft changes the install method with each version of Microsoft Windows.
Let's look at how to quickly install the tools using Powershell with just one line of code and modifying local group policy if you encounter issues, especially if you are in an environment that is using Windows Server Update Services (WSUS).
Go to your Windows Start Menu, look for Powershell, and right-click to get the submenu, then click on "Run as Administrator". Enter the Powershell command below to install RSAT for Windows 10.
Get-WindowsCapability -Online | Where-Object {$_.Name -like "Rsat*" -AND $_.State -eq "NotPresent"} | Add-WindowsCapability -Online If things go wrong, you may see the following:
Add-WindowsCapability : Add-WindowsCapability failed. Error code = 0x800f0954
At line:1 char:103
+ ... sat*" -AND $_.State -eq "NotPresent"} | Add-WindowsCapability -Online
+ ~~~~~~~~~~~~~~~~~~~~~~~~~~~~~
 + CategoryInfo : NotSpecified: (:) [Add-WindowsCapability], COMException
 + FullyQualifiedErrorId : Microsoft.Dism.Commands.AddWindowsCapabilityCommand
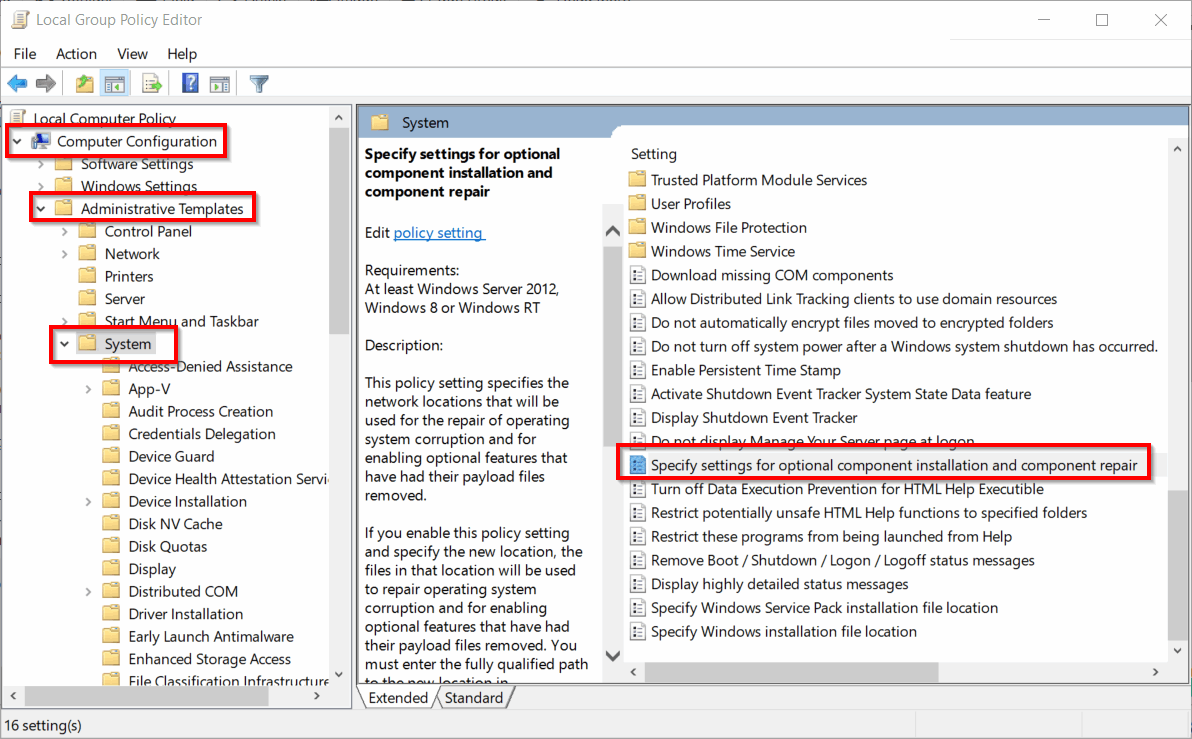
If you see the errors above, then you'll need to make a change to your local group policy. Launch local group policy editor by going to Windows Start Menu and typing gpedit.msc. Navigate to "Computer Configuration\Administrative Templates\System\Specify settings for optional component installation and component repair" and make the changes shown below.
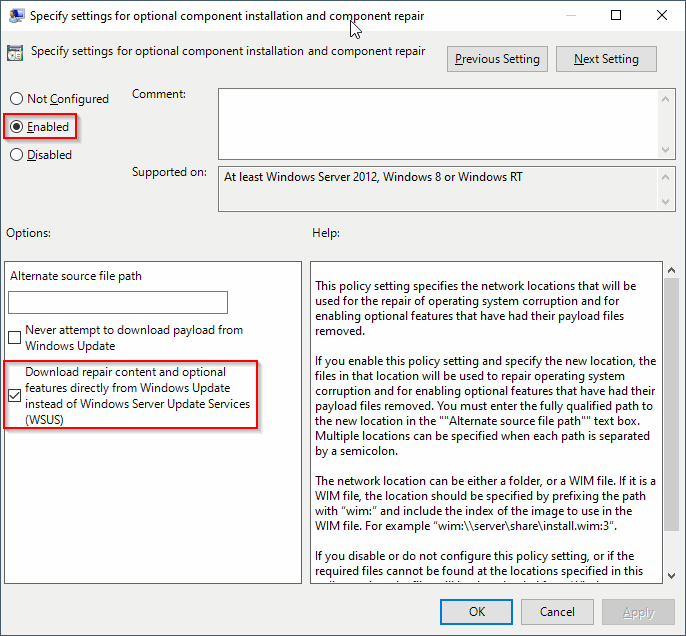
Set the following settings:
- Enabled
- Check the box for "Download repair content and optional features directly from Windows Update instead of Windows Server Update Services (WSUS)"
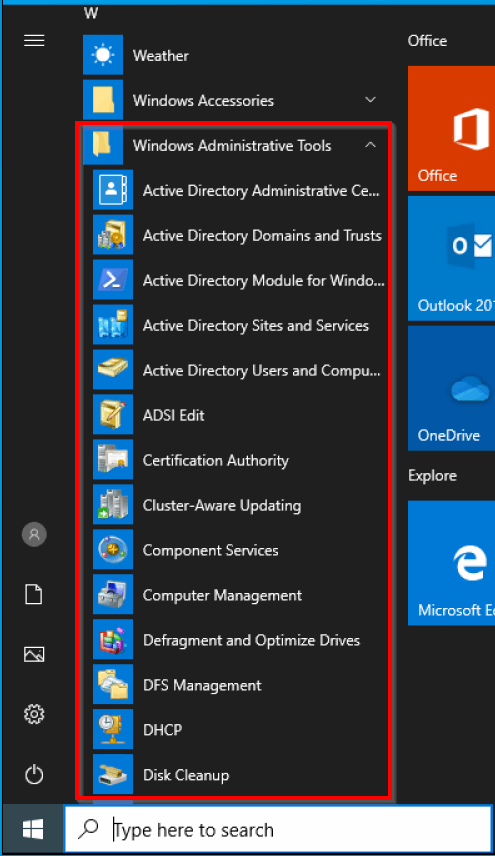
You should now see all the tools in your Windows Start Menu.
Don't forget to switch back the setting in Group Policy if you're in a corporate environment.
Popular Tags
Latest Articles
-
VMs get Powered OFF when expanding virtual Disk
-
Temporarily clear locks from your VMs and disks fast
-
Simple Guide on How to Fix a Printer That's Offline
-
SSHing to a Ubiquiti Switch: A Step-by-Step Guide
-
How to Uninstall MSI Using PowerShell and an RMM
-
Getting Started with VMware: Subscribing to VMUG & Getting Discounted Licensing for Your Home Lab
-
AI – A Risky Business: Unveiling the Dangers of AI
-
Key Distinctions between VMware vSphere ESXi and Microsoft Hyper-V
Categories
Certifications

